Introduction
Docker is an open-source Linux-based containerization platform that enables developers to package their applications into containers, Containers are the executable components that combine the application source code along with the operating system libraries and dependencies required to run the code in any environment. The benefit is that developers don’t need to worry that whether their code will run in the same manner as it’s running on their machine. Docker is gaining popularity over the years and is a must-have skill now. This blog will teach you about the docker commands that are frequently used. Before moving to the docker commands and the docker commands list, it is essential to have a good understanding of what docker is all about.
What is Docker?

When working on a large project, several developers collaborate together. Multiple teams are formed in order to build a project. On a large scale, we can consider that there is a development team that will develop the applications, a testing team that will test the applications and an operations team that will deploy the application on the production server. The process varies from company to company.
As a developer, you might be using some frameworks, like Spring framework or Django framework. This framework needs some dependencies, the dependencies in turn vary from operating system to operating system and version to version. That means a code that was successfully compiled in version 1.0.1 might not run the same in version 1.0.2. This is a problematic issue. The first solution is to give every dependency and specification in a zip file or a jar file while shipping it to another team. The problem here is some dependencies are dependent on the Operating System. You cannot give your entire Operating System to another person.
Confused about your next job?
The solution is using a Hypervisor. A hypervisor, also known as a virtual machine monitor or VMM is software that creates and runs virtual machines (VMs). A hypervisor allows one host computer to support multiple guest VMs by virtually sharing its resources between VMs, such as memory and processing. Think of a Hypervisor as follows: You have your computer hardware and on top of it there is an Operating System, You can install a Hypervisor in your system and can run a Guest OS on it. The best part is you can easily ship your OS by creating its virtual image for any other person. Once the other person has received an image, they can create its instance and can run it. This is the concept of virtualization.
However, creating a new virtual machine every time for a new application becomes cumbersome. From here the concept of containerization comes into the picture. Containerization is the evolution of virtualization. While virtualization focuses on the distribution of Operating Systems, containerization on the other hand focuses on breaking down Operating Systems into chunks that can be used more effectively.
In a nutshell, Containers are a solution to the problem of how to get software to run reliably when moved from one computing environment to another.
Top Docker Commands
Before moving on to the docker commands list, it is essential that you have docker installed in your systems. If you have already installed it, then you can proceed forward. In case you don’t have docker installed you can easily do so, by following the steps mentioned in the documentation.
In case you are just starting out and don’t want to set up docker you can use the online docker playground, Play with Docker, Its a project sponsored by docker to make it easy for new learners to get started with docker. There is a lab environment where you will get an online terminal to run docker commands free of cost. It’s simple and easy to use.
Let’s see the various docker commands

1. docker –version
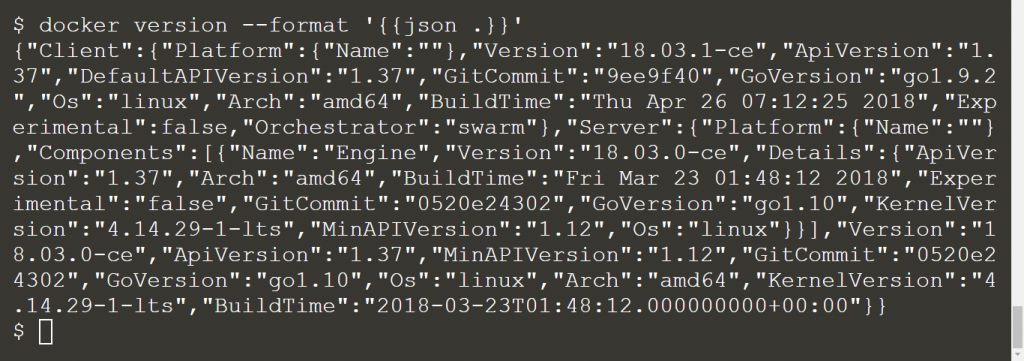
This command by default renders the version information in an easy-to-read layout, You can specify your own format also.

The command can be used in a variety of ways. Some of the ways are given below
- To get the server version, use the following command
docker version –format ‘{{.Server.Version}}’

- To dump the raw json data, use the following command
docker version –format ‘{{json .}}’
2. docker search
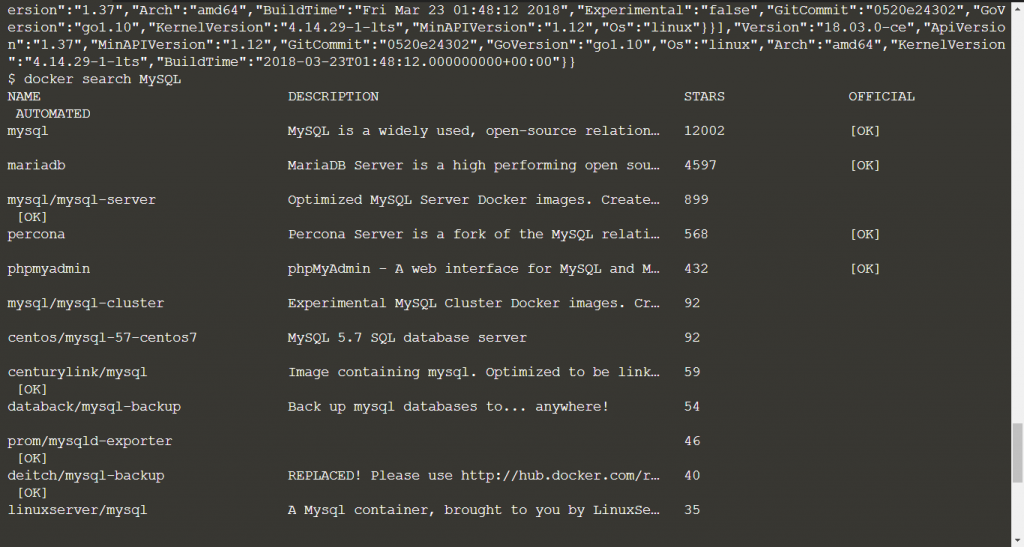
This command is used for searching the docker hub for public images. The returned information contains the image name, description, stars, automated and official along with many other details.
docker search <imageName>
The command docker search MySQL is an example where we are searching for MySQL images, the command will return the available images of MySQL on the docker hub as shown below.
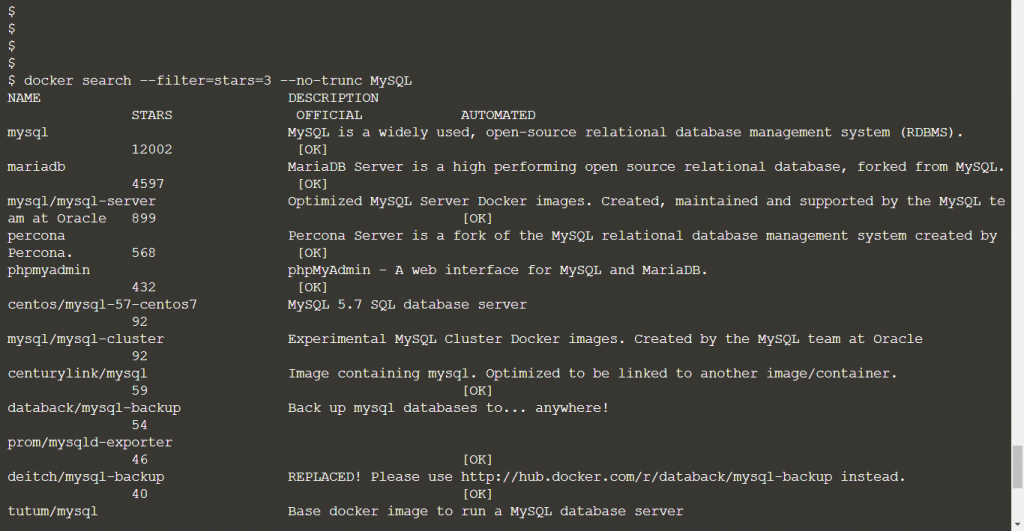
You can modify the command to display a non truncated description using –no trunc as shown below:
docker search –filter=stars=3 –no-trunc MySQL
For example, The command will display the images of MySQL with at least 3 stars with non truncated description.
When you use the search command, by default 25 images are returned. You can limit the result returned by a search using the –limit flag. The values could be in the range between 1 and 100.
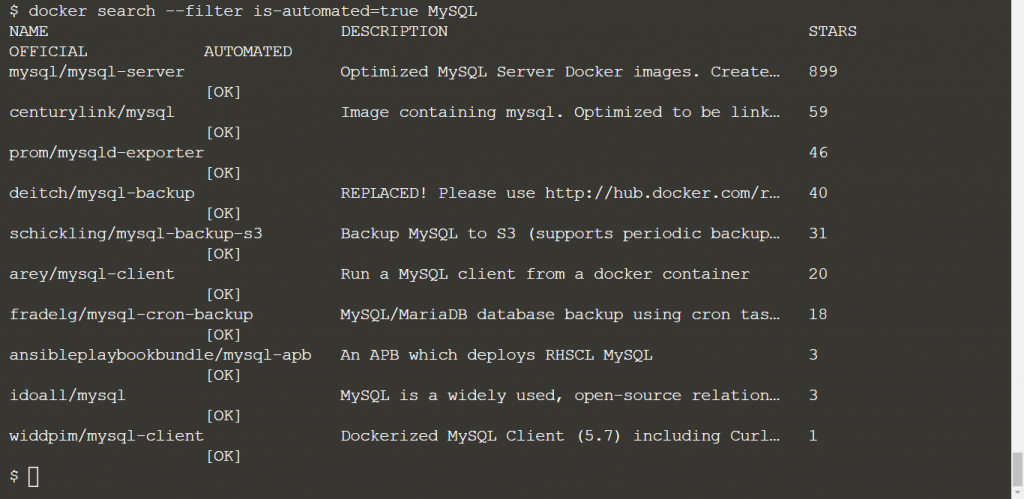
To filter out the images of MySQL on the basis of automated builds use the following command.
docker search –filter is-automated=true MySQL
3. docker pull
This command is used to pull an image or a remote repository from a registry. There are many pre-built images that you can pull to use without having the need to define and configure your own. The below command pulls debian image from dockerhub.
docker pull debian

As you can notice from the above image, docker engine uses the :latest tag by default. If you need to pull a specific version of the image, you can specify it explicitly, The below command pulls the latest version of the Ubuntu 14.04 image by default.
docker pull ubuntu:20.04

As you can notice from the output, the docker prints a digest of the image once the pull has finished. The digest of the image in the above example is
sha256:b5a61709a9a44284d88fb12e5c48db0409cfad5b69d4ff8224077c57302df9cf
But why do we need a digest?
A digest is required because it takes the place of a tag when an image is pulled. So instead of specifying the version you can specify its digest. Lets pull the above image using its hash. The command will be:
docker pull <digest>
Go ahead and try this on your own!!
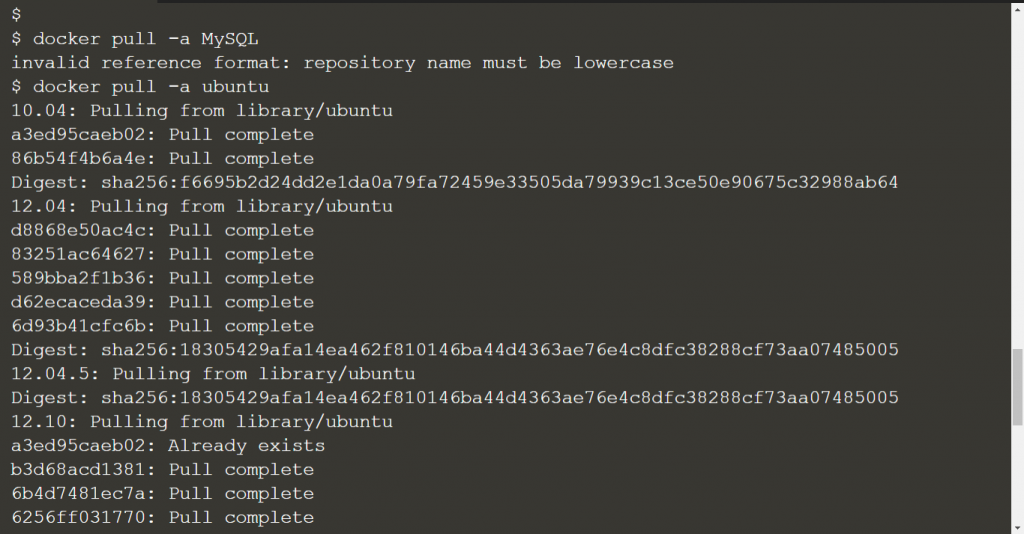
The docker pull command pulls a single image from registry, to pull all images from a repository you can use the -a tag when using the docker pull command. The below example illustrates the same
docker pull -a ubuntu
4. docker images
This command is used to list down all the images that are currently present in your docker hub. This command will show all the top level images, their repositories and tags and their size, you can refer to the screenshot below.

The command takes an optional [REPOSITORY[:TAG]] argument that will restrict the list to images that match the argument. To list all the images in the java repository, you can use the command.

5. docker run
This command is used to create a container from an image or to run a command in a new container. The command first creates a writable container layer over the image specified and then it started using a specific command.
The below command is used to create a container for the ubuntu image.
docker run -it -d ubuntu

You can use the docker ps command to view the active containers as shown below.

You can refer to the official documentation for more details.
6. docker exec
This command is used to access the running container and run the command in a running container. You can access any container using its container id. The container id can be viewed using the docker images command as shown below.

The syntax of docker exec command is
docker exec -it bash
To execute the above command you first need to start a container using the following command
docker run –name ubuntu_bash –rm -i -t ubuntu bash
A container named ubuntu_bash will be created and a bash session is started

Now you can execute a command on the container
docker exec -d ubuntu_bash touch /tmp/execWorks
A new file named /tmp/execWorks will be created inside the running container ubuntu_bash in the background.
7. docker stop
As the name suggests, this command creates one or more running containers.
docker stop <container id>
8. docker restart
You can restart using the stopped container by the restart container.
docker restart <container id>
9. docker logs
This command is used to retrieve/fetch the logs present at the time of execution of a docker command. The command is very helpful when debugging your docker containers.
docker logs <container name>
10. docker rm
The command is used to remove one or more containers. The below command will remove the container
docker rm <container name>
So far so good, you now have a good understanding of basic docker commands and know how to perform some basic operations using docker.
Conclusion
In this guide, we came to know about the basic docker commands. Docker is an open-source, Linux-based containerization platform that is used by developers to build, run and package their applications for containers. It offers Operating System level abstraction with minimal resource utilization.
Knowing docker is a must-have skill whether you are a developer, a tester or a DevOps engineer. I hope this article has helped you out. If you are preparing for your interviews as a fresher or if you are experienced and looking to switch jobs, then Interview Bit is the right place to start. It has several tracks including Programming, System Design, Puzzles and Scripting along with company-specific preparation guides and fast-track courses. Do check out InterviewBit to upskill yourself.
Frequently Asked Questions
Q.1: How many Commands are there in Docker?
Ans: There are 13 management commands and 41 general commands in docker.
Q.2: Is Docker Free to use?
Ans: Docker Desktop remains free for small businesses (fewer than 250 employees AND less than $10 million in annual revenue), personal use, education, and non-commercial open-source projects. It requires a paid subscription (Pro, Team, or Business), for as little as $5 a month, for commercial use in larger enterprises.
Q.3: Is Docker Easy to Learn?
Ans: Docker is easy to learn and is a time-saving tool.


 Join WhatsApp Group


